画像の幾何変換
目的
- 並進,回転,アフィン変換といった幾何変換を学ぶ.
- 次の関数の使い方を学ぶ: cv2.getPerspectiveTransform
変換
OpenCVは2つの変換関数cv2.warpAffine と cv2.warpPerspective を提供している. cv2.warpAffine は2x3の変換行列を入力するのに対して cv2.warpPerspective は3x3の変換行列を入力とする.
スケーリング(拡大・縮小)
スケーリングは画像のサイズ変更のみを行う.この変換のために cv2.resize() 関数が用意されている.変更後の画像サイズもしくは縮尺を指定する必要がある.補間方法には複数あるが,縮小には cv2.INTER_AREA ,拡大には cv2.INTER_CUBIC (処理が遅い) や cv2.INTER_LINEAR が適している.デフォルトnの補間方法は cv2.INTER_LINEAR である.以下に示すいずれかの方法を使ってスケーリングができる (コード, 対象画像):
import cv2
import numpy as np

img = cv2.imread('messi5.jpg')

res = cv2.resize(img,None,fx=2, fy=2, interpolation = cv2.INTER_CUBIC)

#OR

height, width = img.shape[:2]
res = cv2.resize(img,(2*width, 2*height), interpolation = cv2.INTER_CUBIC)
並進
並進は物体の位置を移動させる処理である.(x,y)方向への移動量が  であるとすれば,この並進を表す変換行列
  は以下のようになる:
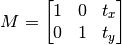
データ型が np.float32 のNumpyの配列に値を設定し, cv2.warpAffine(img,M,Size) 関数に与える.次の例では移動量を (100,50) としている(コード, 対象画像):
import cv2
import numpy as np
img = cv2.imread('messi5.jpg',0)
rows,cols = img.shape

M = np.float32([[1,0,100],[0,1,50]])
dst = cv2.warpAffine(img,M,(cols,rows))

cv2.imshow('img',dst)
cv2.waitKey(0)
cv2.destroyAllWindows()
Warning
cv2.warpAffine(img,M,Size) 関数の第3引数Sizeには出力画像のサイズを (width, height) という形式で指定しなければならない。ここでwidthは列の数,heightは行の数である.
結果は次のようになる:

回転
画像を  ラジアン回転させるための変換行列は次である.
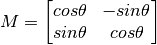
OpenCVが提供する回転は拡大縮小(スケーリング)も同時に行い,回転の中心位置も変更できる.回転変換を表す変換行列は以下のようになる.

ここで center.xとcenter.yは回転中心の座標、scaleは拡大率で、αとβは以下:
この変換行列を計算するために cv2.getRotationMatrix2D 関数が用意されている.次の例はスケーリングをせずに画像中心に対して90度回転する変換を行う (コード, 対象画像):
img = cv2.imread('messi5.jpg',0)
rows,cols = img.shape

M = cv2.getRotationMatrix2D((cols/2,rows/2),90,1)
dst = cv2.warpAffine(img,M,(cols,rows))
結果は以下:

アフィン変換
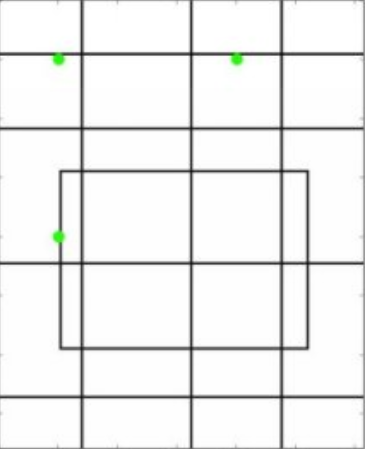
アフィン変換においては、元画像で並行な直線はみな、変換後の画像においても並行性が保れるという性質がある.変換行列を計算するには、入力画像と出力画像の対応点の座標が少なくとも3組必要である.cv2.getAffineTransform 関数を使い2x3の変換行列を作成し, それをcv2.warpAffine 関数に与えて画像を変換する.
次のコードは3組の対応点(入力,出力画像上で緑色の円で表示)を指定したアフィン変換の例である : (コード, 対象画像)
img = cv2.imread('drawing.png')
rows,cols,ch = img.shape

pts1 = np.float32([[50,50],[200,50],[50,200]])
pts2 = np.float32([[10,100],[200,50],[100,250]])

M = cv2.getAffineTransform(pts1,pts2)

dst = cv2.warpAffine(img,M,(cols,rows))

plt.subplot(121),plt.imshow(img),plt.title('Input')
plt.subplot(122),plt.imshow(dst),plt.title('Output')
plt.show()
この結果は次のようになる.:

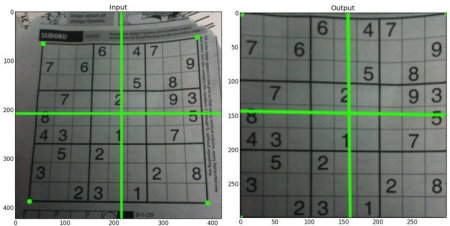
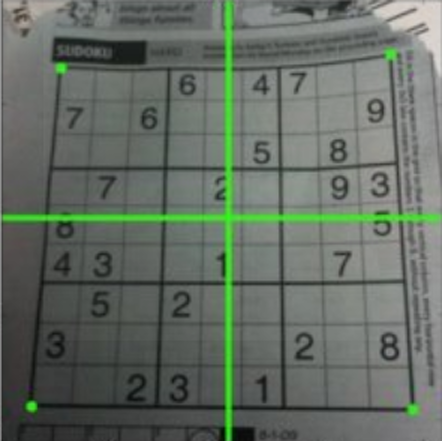
射影変換
射影変換は3x3の変換行列が必要である.変換の前後で直線性が保たれる.変換行列を計算するには少なくとも4組の対応点の座標が必要で、しかもこれら4点のどの3点をとっても同一の直線上に乗らないよう選ぶ必要がある. cv2.getPerspectiveTransform 関数を使って変換行列を計算し, cv2.warpPerspective 関数を使って画像を変形する.
img = cv2.imread('sudokusmall.png')
rows,cols,ch = img.shape

pts1 = np.float32([[56,65],[368,52],[28,387],[389,390]])
pts2 = np.float32([[0,0],[300,0],[0,300],[300,300]])

M = cv2.getPerspectiveTransform(pts1,pts2)

dst = cv2.warpPerspective(img,M,(300,300))

plt.subplot(121),plt.imshow(img),plt.title('Input')
plt.subplot(122),plt.imshow(dst),plt.title('Output')
plt.show()
この結果は次:
補足資料
- “Computer Vision: Algorithms and Applications”, Richard Szeliski